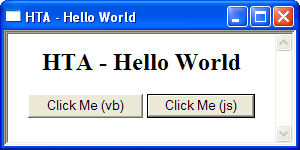
The next part of the SCCM 2012 R2 HTA blogs – Launching applications!
In the previous blog I’ve shown how to launch the imaging process based on a specific image using the TSENV variables.
This next blog is about using the same HTA we’ve created before but this time adding buttons to launch another application, as an example we’ll try to launch HDTune to check the HDD status and ProduKey to retrieve the Windows and Office keys.
There are two gotcha’s related to launching applications in WinPE.
- WinPE currently has no SysWOW64 support – In short this means you cannot run 32 bit applications in 64 bit WinPE. You will receive the error “The Subsystem needed to support this image type is not available”
- Applications which have a lot of .NET calls or use .NET4.5 will not function in WinPE
Quite simply put this means that we have to make sure our applications are small or/and do not rely on the .NET framework too much.
The 32/64 bit issue can be resolved too if you do not have any machines that use UEFI boot you can safely distribute ONLY the x86 PXE boot image. When you distribute this image all machines that PXE boot will use the 32 bit boot image, and you will only require the 32 bit version of applications. You can still install Drivers and Windows Images based on x64 using a 32 bit boot image, just not using the Windows Installer Packages. Let’s hope Microsoft will add SysWow64 support in the next WinPE version 😉
As before we will leverage VBScript and the HTA file to create a menu from where we can launch applications and start the imaging process directly after using the application.
As in the previous blogpost, Its example time! The following is the updated HTA code to run applications.
Default.hta:
<button onclick=”vbscript:RunProgram(‘ProduKey.exe’)”>Run ProduKey</button>
<button onclick=”vbscript:RunProgram(‘HDTune.exe’)”>Run HDTune</button><select name=”ImageName”>
<option value=”W8NL”>Windows 8.1 NL x64</option>
<option value=”W8ENG”>Windows 8.1 ENG x64</option>
</select>
<input id=runbutton type=”button” value=”GO” name=”run_button” onClick=”vbscript:ButtonFinish”><SCRIPT LANGUAGE=”VBScript”>
‘We hide the TS Progress bar – Its annoying because it keeps focus.
Set ProgressUI = CreateObject(“Microsoft.SMS.TsProgressUI”)
ProgressUI.CloseProgressDialog‘Sets up actions to run when we click on “Run Application” buttons
Sub RunProgram(Appname)
Set objShell = CreateObject(“Wscript.Shell”)
objShell.Run “S:\” + AppName
End Sub‘Sets up actions to follow clicking on GO button.
Sub ButtonFinish
dim wimimage
SET TSEnv = CreateObject(“Microsoft.SMS.TSEnvironment”)‘Sets Variable for image W8NL
If ImageName.value = “W8NL” then
wimimage = “W8NL”
End If‘Sets Variable for image W8ENG
If ImageName.value = “W8ENG” then
wimimage = “W8ENG”
End If
TSEnv(“wimimage”) = wimimage‘When we close the window – The TS will continue and start the imaging process
window.Close
End Sub
</SCRIPT>
Our S:\ drive includes the Default.HTA as before, and also the 2 tools that we would like to run directly in the root.
I hope in the next blog I’ll be able to write about a bit of Powershell or universal images. 🙂
